5 Essential Steps to Restore Your Smile with Full Mouth Dental Implants
By Complete Advanced Dentistry
The journey toward a revitalized, functional smile is more than just a cosmetic upgrade; it is a life-changing medical restoration that impacts your nutrition, speech, and self-esteem. Understanding the modern dental implant protocol is crucial for any patient considering full-arch rehabilitation. In this expert breakdown, we explore the accelerated 5-step process used by world-class implantologists to deliver permanent, high-durability results. Watch as we demystify the timeline, from the initial surgical placement under sedation to the final adjustment of a premium Zirconia prosthesis, ensuring you know exactly what to expect during your restorative journey.
Video Chapters & Clinical Milestones
The landscape of restorative dentistry has shifted from long, drawn-out procedures to highly efficient, digital workflows. Patients today can achieve a full-arch restoration—often referred to as "Teeth in a Day" or "All-on-X", with far fewer visits than traditional methods required. In the featured video, Dr. Michel Elenes, an expert implantologist, outlines the five specific stages of this transformation.
Step 1: Surgical Precision and Sedation Protocols
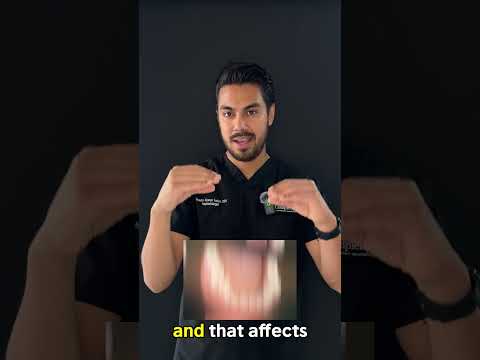
The first step in any full-mouth restoration is the surgical placement of the dental implants. This occurs during the first visit, which typically spans only two days. At [00:05], Dr. Benes highlights that on "Day No. 1," the primary focus is placing the titanium roots into the jawbone.
Modern implantology utilizes 3D CBCT scanning and computer-guided surgery to ensure that each implant is positioned with sub-millimeter accuracy. This precision is vital for the long-term stability of the prosthesis. Furthermore, this entire surgical phase is conducted under sedation. For many patients, dental anxiety is a significant barrier to care. By utilizing IV sedation or general anesthesia, patients can remain completely relaxed and pain-free, often with little to no memory of the procedure itself.
Immediately following the placement of the implants, the dental team takes an impression or a digital intraoral scan. This is used to fabricate your temporary teeth, ensuring you never have to leave the office without a functional smile.
Step 2: Designing Your "Trial" Smile
On the second day of your first visit, as mentioned at [00:19], the focus shifts to aesthetics and function. This is a collaborative phase where the patient has a significant say in the final look of their restoration.
During the "test" phase, you will work with the clinical team to choose:
- Color and Shade: Finding a natural white that complements your skin tone and age.
- Tooth Form and Shape: Deciding between more rounded, softer shapes or more square, masculine aesthetics.
- Size and Proportions: Ensuring the teeth fit the scale of your face and smile line.
The beauty of this step is that within just a few hours, you walk out with a temporary but highly aesthetic set of teeth. These temporaries serve as a "blueprint" for your permanent teeth, allowing you to test the bite, the speech, and the overall look in your daily life before the final version is created.
Step 3: The Critical Healing and Osseointegration Period
After the initial two-day excitement, a period of biological patience is required. As explained at [00:35], there is a mandatory four-month waiting period. This is not arbitrary; it is governed by the speed of human bone regeneration.
Osseointegration is the process where the living bone cells actually attach themselves to the surface of the dental implant. Without this fusion, the implants would not be able to withstand the incredible forces generated by chewing. During these four months, the titanium post essentially becomes a permanent part of your anatomy.
While you wait, you are wearing your high-quality temporary teeth, allowing you to eat a modified soft diet and smile with confidence. The implants are "quietly" healing beneath the gum line, establishing a rock-solid foundation for the final bridge.
Step 4: Transitioning to the Final Zirconia Prosthesis
Once the four-month healing period is complete and the surgeon has verified that the implants are fully integrated, it is time for the final visit. At [00:46], the transition from temporary to permanent occurs.
In high-end implantology, Zirconia is the gold standard material for full-arch bridges. Unlike older acrylic or porcelain-fused-to-metal options, Zirconia offers several unique benefits:
| Feature | Zirconia Advantage |
|---|---|
| Durability | Virtually chip-proof and resistant to high bite forces. |
| Aesthetics | Natural translucency that mimics real tooth enamel. |
| Hygiene | Non-porous surface that resists plaque and staining. |
| Biocompatibility | Promotes healthy gum tissue and zero allergic reactions. |
The temporary teeth are removed, and the final Zirconia bridge is securely attached to the implants. This is the moment where the patient experiences the true strength and "feel" of their new smile.
Step 5: The Refinement and Occlusion Tuning
Even the most perfect-looking teeth require fine-tuning. At [00:55], Dr. Benes emphasizes that the final step involves a five-day period for adjustments. This is perhaps the most overlooked but critical part of the process.
During these five days, the doctor monitors your occlusion (how your upper and lower teeth meet). If the bite is even slightly off, it can cause discomfort, headaches, or even put undue stress on the implants, leading to failure. By taking several days to monitor the patient's speech and chewing patterns, the clinical team can make micro-adjustments to the Zirconia to ensure the result is perfectly balanced.
Once these refinements are complete, the restoration is considered "done," and the patient is cleared to enjoy their full range of dietary choices and a lifetime of confident smiles.
The Transformative Power of Modern Implantology
The final seconds of the video show a powerful comparison between the "Before" and "After" states. Many patients arrive with failing dentition, severe decay, or existing dentures that slip and cause pain. The transition to a fixed, implant-supported Zirconia bridge is not just an aesthetic improvement it is a functional revolution.
With a success rate often exceeding 98% for full-arch restorations, dental implants represent the highest standard of care in modern dentistry. By following this structured 5-step protocol, clinics are able to maximize patient comfort, ensure biological success, and deliver a smile that looks, feels, and functions like natural teeth.
Key takeaways from the professional protocol include:
- Efficiency: Two main visits separated by a healing window.
- Comfort: Use of sedation for all major surgical steps.
- Customization: Active patient involvement in the "trial smile" phase.
- Materials: Long-term use of Zirconia for its unmatched strength and beauty.
- Verification: A 5-day final adjustment period to ensure bite perfection.
Ready to Restore Your Smile in Los Algodones?
PlacidWay Medical Tourism connects you with top-rated dental clinics in Los Algodones, offering world-class care at unbeatable prices. Let us handle the details while you focus on your new smile.
GET A FREE QUOTEView Full Video Transcript
[00:00] Five steps to restore your smile with implants.
[00:05] Only two visits are needed. In the first visit, we need two days. On day number one, we can place your implants and take an impression for your temporary teeth.
[00:15] All these under sedation.
[00:19] On day two, we'll do a test and you will choose the color, form, size, and other details for your temporary teeth. And after that, in a few hours, you can go back home with your new smile.
[00:35] After for four months, the implants fuse and heal in the bone. And we are ready for the final step: your last visit.
[00:46] In this visit, we will replace your temporary teeth for your final zirconia prosthesis.
[00:55] Last but not least, we need five days to make the final adjustments and we are done.
[01:04] [Visual display of Before and After transformation results].


Share this listing