Navigating the complexities of human fertility requires precise medical intervention and specialized care. Opting for an In Vitro Fertilization (IVF) treatment in Cyprus provides prospective parents with access to advanced reproductive technologies and highly experienced embryologists. This sophisticated medical pathway offers a viable solution for individuals facing various infertility diagnoses, ranging from fallopian tube blockages to severe male factor infertility.
The fundamental objective of this procedure involves carefully extracting mature eggs, fertilizing them within a highly controlled laboratory environment, and transferring the resulting healthy embryos directly into the uterus. By bypassing natural physiological barriers, fertility specialists can closely monitor and optimize every cellular interaction. Patients must understand each distinct phase of this journey to make informed decisions regarding their reproductive health.
Throughout the protocol, rigorous timing and precise hormonal manipulation are absolutely critical for a successful outcome. From the initial injection protocols to the critical two-week wait, the entire framework is designed to maximize the chances of a healthy pregnancy. Understanding the nuanced details of these interventions empowers patients and significantly reduces procedural anxiety.
Video Chapters
Understanding the Step-by-Step IVF Process Timeline
A structured approach to reproductive medicine ensures that each patient receives tailored medical care suited to their unique physiological baseline. The step by step IVF process timeline generally spans several weeks, beginning meticulously with the onset of the natural menstrual cycle. Following a strict schedule is paramount, as the human reproductive system relies on precise hormonal surges to mature and release viable oocytes.
At the very start of the protocol, fertility specialists conduct baseline transvaginal ultrasounds and serum blood tests. These diagnostics measure resting follicle counts and baseline hormone levels, dictating the exact dosage of stimulation medications required. Outlining these preliminary milestones at [00:11] ensures that the ovaries are quiet and ready to respond to exogenous hormones without the interference of preexisting cysts.
This overarching timeline is divided into discrete, highly monitored stages that require frequent clinical visits. Patients must be prepared for dynamic scheduling, as follicular growth rates vary significantly between individuals. Adjustments to the treatment calendar are common and represent proactive medical management rather than protocol failure.
Key Phases of the Treatment Cycle
- Baseline Assessment: Evaluating ovarian reserve and resting follicle counts on cycle day two or three.
- Stimulation Phase: Administering daily injectable medications to promote simultaneous follicular growth.
- Maturation Trigger: A specialized hormonal injection timed perfectly to finalize egg maturation prior to ovulation.
- Surgical Retrieval: Minimally invasive aspiration of follicular fluid to collect the mature oocytes.
Phase One: Ovarian Stimulation Medications for IVF
During a standard unmedicated menstrual cycle, the body typically develops and releases only a single mature egg. However, successful assisted reproduction relies on securing a larger cohort of eggs to compensate for natural attrition rates during laboratory fertilization. To achieve this, patients administer specialized ovarian stimulation medications for IVF, primarily consisting of Follicle Stimulating Hormone (FSH) and Luteinizing Hormone (LH).
These hormone medications are introduced via subcutaneous injections, as highlighted at [00:16], directly into the fatty tissue of the abdomen. The stimulation phase typically lasts between 8 to 11 days, during which the patient's biological response is heavily scrutinized. Regular transvaginal ultrasound exams, demonstrated at [00:36], measure the diameter of the growing follicles to ensure they are expanding at an optimal rate.
Once the leading follicles reach a target diameter of approximately 18 to 22 millimeters, the daily stimulation medications are halted. At this critical juncture, a precise "trigger shot" of Human Chorionic Gonadotropin (hCG) or an agonist is administered. This crucial injection, mentioned at [00:41], chemically induces the final meiotic division within the eggs, preparing them for imminent surgical removal exactly 36 hours later.
| Monitoring Stage | Typical Cycle Day | Medical Action |
|---|---|---|
| Baseline Check | Day 2 or 3 | Resting follicle count and blood estradiol baseline. |
| Mid-Stimulation | Day 6 to 8 | Ultrasound measurement of follicle growth and medication adjustment. |
| Trigger Day | Day 10 to 12 | Final ultrasound confirming mature size, followed by the trigger injection. |
The Egg Retrieval Procedure Experience
The transition from the stimulation phase to the surgical collection of oocytes requires careful clinical coordination. Preparing for the egg retrieval procedure experience involves strict fasting protocols, as the patient must abstain from food and liquid for an extended period prior to arriving at the clinic. This ensures the utmost safety while administering intravenous sedation within the sterile operating room environment, as seen at [00:56].
Under the guidance of high-resolution vaginal ultrasonography, the fertility specialist advances a hollow aspiration needle through the vaginal wall directly into the stimulated ovaries. The physician systematically punctures each mature follicle, utilizing gentle suction to extract the follicular fluid containing the microscopic eggs. This highly efficient surgical intervention typically requires only 10 to 15 minutes to complete, as noted at [01:07].
Immediately following the aspiration, patients are transferred to a dedicated recovery suite to awaken from the sedation while clinical staff monitors vital signs. Mild pelvic cramping and light spotting are common, expected physiological responses following the puncture of the ovarian capsules. Most individuals are medically cleared to return home within two to three hours and are strongly advised to dedicate the remainder of the day to complete physical rest.
Advanced Laboratory Investigations and Intracytoplasmic Sperm Injection (ICSI)
While the patient recovers from surgery, the most critical biological events transition into the highly controlled environment of the embryology laboratory. The collected tubes of follicular fluid are immediately transferred to embryologists who examine the contents under high-powered microscopes to isolate the cumulus-oocyte complexes. Only eggs that have reached the precise metaphase II stage of meiotic maturation are deemed viable for subsequent fertilization attempts.
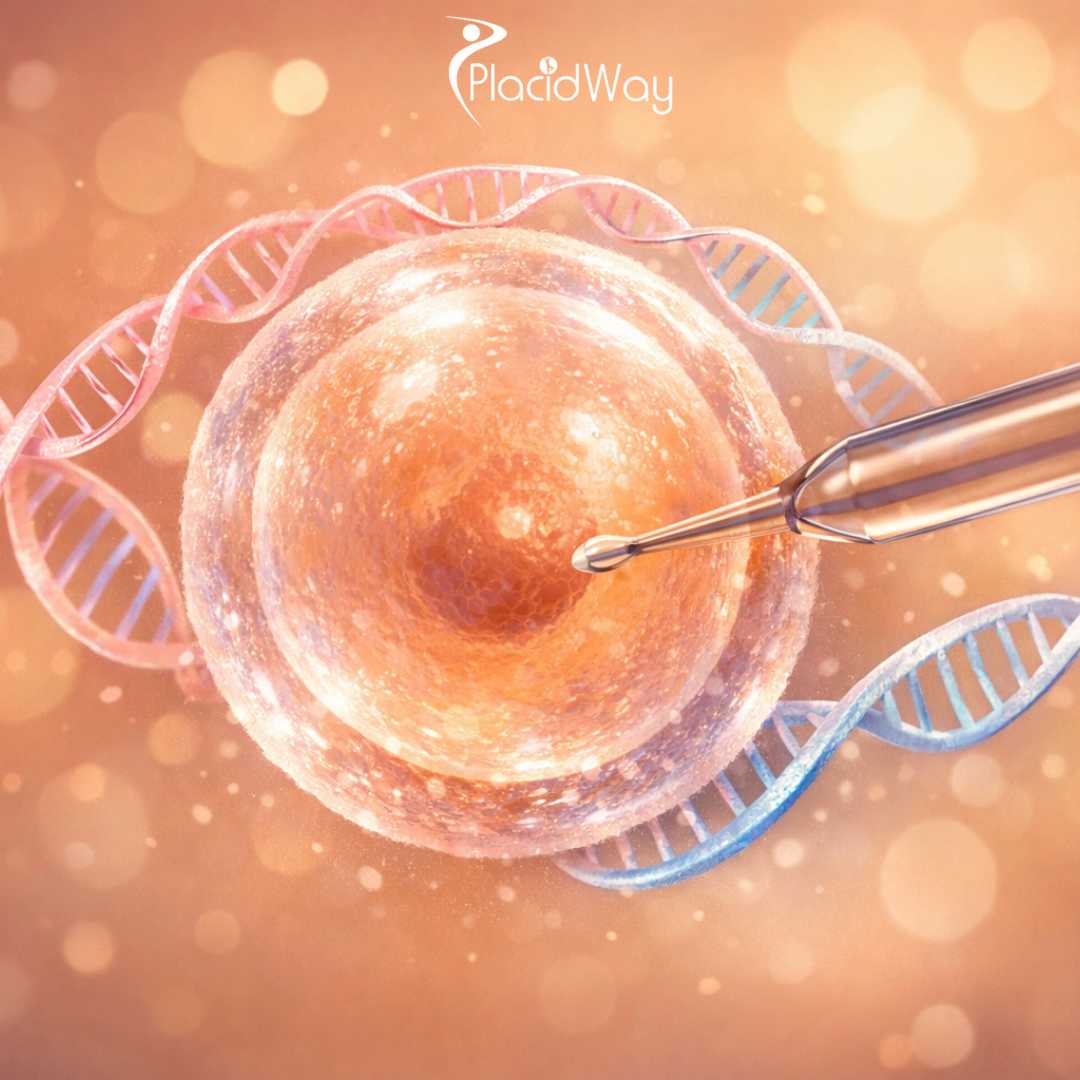
To maximize fertilization success rates, many modern clinics utilize Intracytoplasmic Sperm Injection (ICSI) rather than conventional insemination. As demonstrated at [01:23], this intricate technique involves capturing a single, morphologically optimal sperm and injecting it directly into the cytoplasm of the mature egg. This micromanipulation technique effectively circumvents severe male factor infertility issues, such as low sperm motility or poor morphology.
Following the injection, these newly combined cells are promptly placed into advanced benchtop incubators. These specialized units tightly regulate atmospheric gases, temperature, and pH levels to perfectly mimic the internal environment of the human fallopian tube. Approximately 18 to 21 hours post-injection, as mentioned at [01:33], the embryologist evaluates each egg to confirm the presence of two pronuclei, which serves as the definitive biological marker of successful fertilization.
Benefits of Utilizing ICSI Technology
- Overcoming Sperm Defects: Allows for successful fertilization even with extremely low sperm counts or poor motility.
- Maximizing Egg Utilization: Ensures that scarce or low-yield retrieved eggs have the highest possible chance of fertilizing.
- Bypassing Zona Pellucida Barriers: Directly penetrates the tough outer shell of the egg, which can sometimes be unnaturally thick.
Embryo Culture and Reaching the Blastocyst Stage
The subsequent days in the laboratory represent a critical period of cellular division and developmental triage. Successfully fertilized embryos undergo rapid mitotic divisions, transitioning from a single cell to a complex multicell structure known as a cleavage-stage embryo by day three. During this intense period of embryo culture, embryologists meticulously grade cellular symmetry and monitor for harmful biological fragmentation that could impede future growth.
The ultimate objective in modern fertility protocols is pushing the embryo culture and blastocyst stage development out to day five or six. As visually depicted at [01:41], a blastocyst is a highly advanced structure comprising hundreds of cells separated into two distinct components: the inner cell mass and the trophectoderm. The inner cell mass is responsible for forming the actual fetus, while the trophectoderm layer will eventually develop into the placental tissues.
Culturing embryos to this extended blastocyst phase serves as an incredibly effective natural selection process. Embryos that harbor significant chromosomal anomalies or lack necessary cellular energy typically arrest their development before reaching this advanced milestone. Consequently, embryos that successfully reach the full blastocyst stage at five days post-fertilization exhibit significantly higher implantation potentials when transferred into the uterus.
| Development Day | Cellular Milestone | Laboratory Assessment |
|---|---|---|
| Day 1 | Pronuclear Stage | Confirmation of normal fertilization (2PN). |
| Day 3 | Cleavage Stage | Evaluation of 6 to 8 uniform cells with minimal fragmentation. |
| Day 5/6 | Blastocyst Stage | Assessment of expansion, inner cell mass, and trophectoderm quality. |
Preimplantation Genetic Testing Options for High Success Rates
To further optimize clinical outcomes, many patients integrate advanced screening technologies into their treatment plans. Depending on the clinical indication and maternal age, a targeted biopsy may be recommended on the third or fifth day of development, as shown at [01:51]. Preimplantation Genetic Testing for Aneuploidies (PGT-A) involves the precise removal of a few trophectoderm cells using a precise clinical laser.
These extracted cells are then genetically sequenced to ensure the embryo possesses the correct number of chromosomes—exactly 46 in a healthy human configuration. Embryos that are genetically abnormal, known as aneuploid, are the leading cause of failed implantation and early miscarriage in both natural and assisted reproduction. By transferring only confirmed euploid (chromosomally normal) embryos, clinics drastically improve the overall success rates of IVF treatments per transfer.
While awaiting these comprehensive genetic results, the blastocysts are safely cryopreserved using an ultra-rapid freezing technique known as vitrification. This modern freezing method prevents the formation of destructive ice crystals within the embryonic cells, ensuring near-perfect survival rates upon thawing. The utilization of PGT mandates a frozen embryo transfer, allowing the patient's uterine environment ample time to recover from the intense ovarian stimulation medications.
The Embryo Transfer Process and Post-Procedure Care
The culmination of the active medical intervention is the physical placement of the blastocyst into the maternal uterus. On the designated day, the patient and physician review the laboratory outcomes to decide precisely how many embryos to thaw and transfer, as depicted at [02:04]. Unlike the initial retrieval surgery, the frozen embryo transfer process requires no anesthesia and is generally experienced as a mild, painless procedure akin to a routine pap smear.
The physician utilizes a soft, highly flexible transfer catheter loaded with the embryo suspended in a microscopic droplet of culture media. Guided by real-time abdominal ultrasound, the catheter is carefully navigated through the cervical canal, as shown at [02:11]. The embryo is gently expelled into the optimal implantation zone at the upper fundus of the uterine cavity, marked by a visible white "flash" on the ultrasound monitor.
Following the brief procedure, patients are often encouraged to rest briefly before being discharged to resume normal, low-impact daily activities. Clinical guidelines recommend strictly avoiding heavy lifting, strenuous cardiovascular exercise, and full immersion in hot water or saunas, as suggested at [02:23]. Maintaining adequate hydration and strictly adhering to prescribed progesterone supplements are vital for stabilizing the uterine lining during the critical implantation window.
Pregnancy Testing and Finalizing Your Fertility Journey
The period immediately following the transfer is colloquially known as the "two-week wait," a phase often characterized by immense psychological anticipation. A quantitative beta hCG blood test is officially scheduled approximately 12 days post-transfer, as highlighted at [02:28]. This specific blood assay accurately measures the circulating levels of human chorionic gonadotropin, providing the definitive diagnosis of clinical pregnancy.
Fertility specialists strongly advise patients to resist the urge to utilize early home urine testing kits prior to the official blood draw. The residual hCG hormone utilized in the initial trigger shot, or the lower sensitivity of commercial kits, can readily result in distressing false positives or false negatives. Only the highly calibrated laboratory blood test can accurately confirm whether the transferred blastocyst has successfully implanted into the endometrial tissue.
Upon receiving a positive quantitative hCG result, the patient will continue their vital hormonal support medications to sustain early fetal development. A follow-up early viability ultrasound is subsequently scheduled several weeks later to confirm the presence of a gestational sac and fetal heartbeat. For individuals ready to explore these life-changing options, initiating contact with specialized institutions like the Sakalli IVF center, shown at [02:43], marks the profound first step toward building their family.
Start Your Family Building Journey Today
Take the critical first step toward parenthood with world-class medical expertise. Request a free, personalized consultation and detailed cost estimate for your highly individualized fertility treatment plan.
Get Free QuoteView Complete Video Transcript
00:00 Nurturing dreams and creating families.
00:03 In vitro fertilization.
00:06 The in vitro fertilization process consists of several key stages.
00:11 Ovarian stimulation.
00:15 Here patients receive hormone medications via subcutaneous injections to encourage the ovaries to produce multiple follicles.
00:23 These follicles contain the eggs needed for fertilization.
00:26 This phase usually begins within the first few days of a menstrual cycle and continues for about 8 to 11 days.
00:33 Throughout this period, the growth of the follicles is carefully monitored through ultrasound exams.
00:39 Once the follicles reach the desired size, a trigger shot induces ovulation, and egg retrieval is scheduled approximately 36 hours later.
00:47 Egg retrieval, fertilization, and embryo culture.
00:50 On the day of retrieval, the patient should come to the clinic fasting and accompanied.
00:56 The retrieval is done under sedation in the operating room using a needle guided by vaginal ultrasound to collect the eggs from the follicles.
01:04 A procedure that typically lasts between 10 and 15 minutes.
01:08 Afterward the patient can usually go home within 2 to 3 hours, advised to rest for the day.
01:16 Laboratory investigations.
01:19 The collected eggs are then examined in the lab.
01:23 Each egg is injected with a single sperm to achieve fertilization.
01:26 The fertilized eggs are then placed in an incubator, creating the perfect environment for their development.
01:33 Within 18 to 21 hours, we check for successful fertilization and continue to culture the embryos until they develop into blastocysts.
01:41 This is an advanced stage of development that occurs about 5 days post-fertilization.
01:48 Depending on your treatment plan, a biopsy for genetic testing may be performed on the 3rd or 5th day.
01:54 Once the results are ready, we proceed with the embryo transfer.
01:57 Embryo transfer.
02:01 On the transfer day, the patient will decide how many embryos to transfer to the uterus.
02:06 This procedure is straightforward and does not require anesthesia.
02:10 A catheter is used to carefully place the embryos in the uterus under ultrasound guidance, ensuring optimal placement.
02:17 The patient can typically return home immediately afterward and resume normal activities, avoiding strenuous exercise or any high-risk activities.
02:28 A pregnancy test is then scheduled 12 days after the transfer to determine if the implantation was successful and pregnancy has occurred.
02:37 Ready to take the next step in your fertility journey?
02:39 Schedule an appointment with our experts today and explore your options with Sakalli IVF center.
02:46 Visit our website to learn more.


.jpg)


Share this listing