The Complete Guide to BTL Spinal Decompression Therapy: Advanced Non-Invasive Pain Relief
About this video: Are you searching for a highly effective, non-invasive alternative to spine surgery? BTL spinal decompression therapy is revolutionizing how medical professionals treat chronic back pain, severe neck stiffness, and debilitating herniated discs. By utilizing a highly sophisticated, electrically driven multi-segmented couch, this advanced treatment provides targeted relief without the inherent risks of traditional surgery. In this comprehensive guide, we will explore the precise mechanisms of action, optimal patient positions, and how specialized decompressive forces drastically rehydrate spinal discs to restore your mobility and daily comfort.
Video Chapters & Quick Navigation
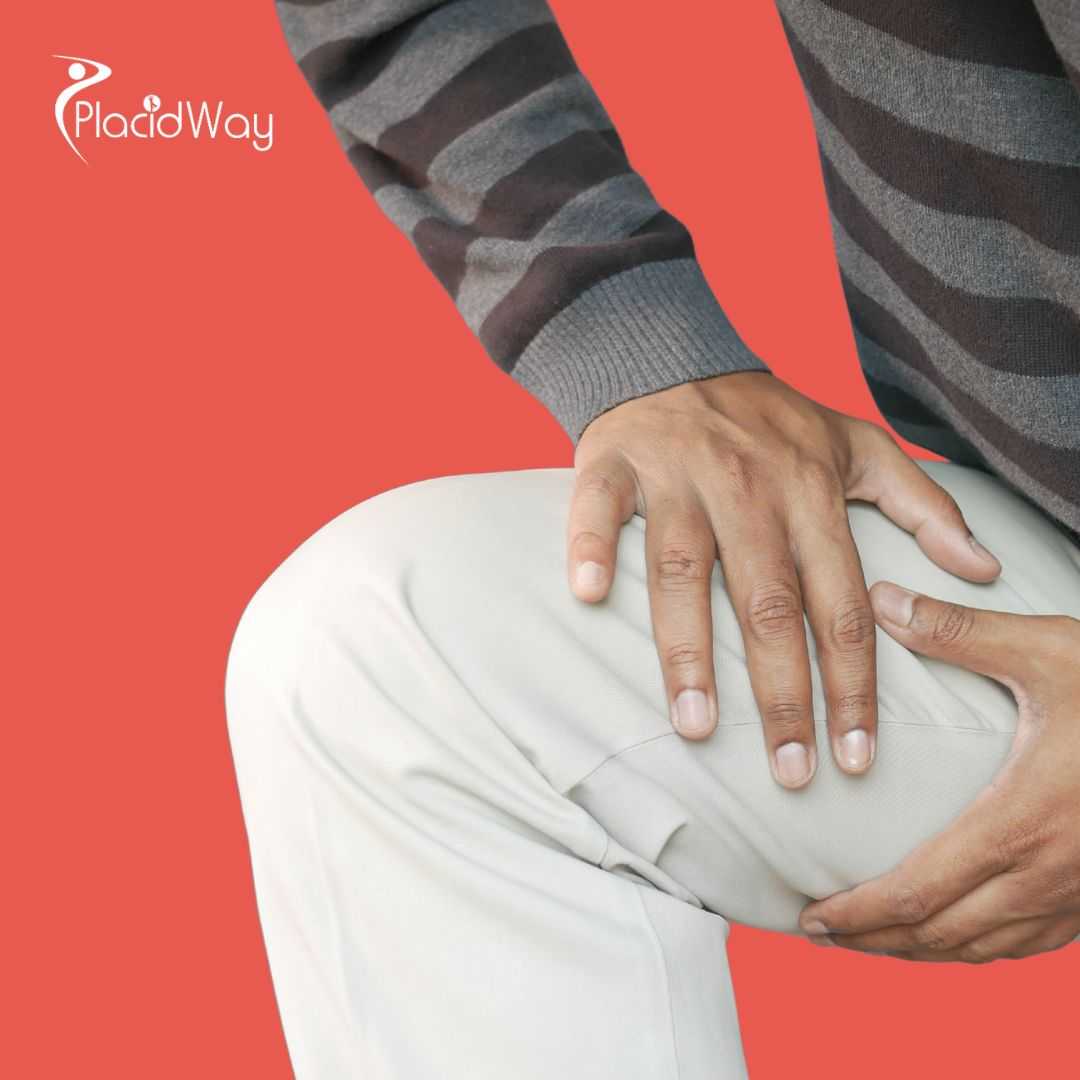
Living with debilitating chronic back pain, searing sciatica, or persistent neck stiffness can dramatically reduce your overall quality of life. For decades, the standard medical advice often pushed patients down a frightening path: rely on heavy pain medications, endure painful epidural steroid injections, or undergo highly invasive spinal fusion surgeries. However, modern medical engineering has provided a groundbreaking solution that addresses the root cause of the pain rather than merely masking the symptoms.
The Evolution of the Non-Invasive Alternative to Spine Surgery
To truly appreciate the technological leap that BTL spinal decompression therapy represents, one must understand the shortcomings of traditional back pain treatments. Historically, physical therapists utilized simple mechanical traction tables to treat spinal compression. Traditional traction involves applying a straight, linear pull to the body. While the intention was to stretch the spine, the human body is incredibly intelligent and defensive. When the body senses a sudden, forceful linear pull, its natural proprioceptive response is to immediately contract the surrounding paraspinal muscles to guard the spine against perceived injury. This muscle spasm reflex actively fights the traction, rendering the treatment ineffective and often causing the patient even more post-treatment pain.
BTL spinal decompression therapy completely circumvents this natural defense mechanism. As highlighted in the demonstration [00:00:29], the therapy relies on a multi-segmented, electrically driven couch. This sophisticated technology utilizes computerized feedback systems to apply pulling forces in a logarithmic curve rather than a linear jerk. By gradually and precisely modulating the force, the system bypasses the body's muscular guarding reflex. The muscles remain relaxed, allowing the decompressive forces to bypass the musculature and directly affect the deep structural components of the spine: the vertebrae and the intervertebral discs.
This paradigm shift from simple traction to advanced computerized decompression represents a monumental advancement for patients seeking a non-invasive alternative to spine surgery. It allows clinicians to provide highly targeted therapy that addresses specific disc levels, such as the commonly afflicted L4-L5 or L5-S1 segments, without subjecting the patient to the massive recovery times and potential complications associated with surgical interventions like laminectomies or spinal fusions.
Understanding the Mechanism of Action in Advanced Spinal Decompression
What exactly happens inside your body when you undergo this specialized physical therapy? The core objective is to fundamentally change the biomechanical environment of your injured spinal discs. As the video explicitly breaks down [00:01:24], spinal decompression aims to unload and release neural spinal structures. It achieves this by creating a highly localized vacuum effect within the disc itself—a phenomenon scientifically referred to as negative intradiscal pressure.
A healthy intervertebral disc acts as a spongy shock absorber between your vertebrae, composed of a tough outer layer (the annulus fibrosus) and a gel-like center (the nucleus pulposus). When a disc is subjected to years of poor posture, repetitive heavy lifting, or acute trauma, it begins to degenerate, lose its hydration, and flatten out. This compression forces the soft inner gel to push outward against the weakened exterior, creating a bulging disc or a severe herniated disc. This protruding material directly pinches the adjacent spinal nerve roots, resulting in the agonizing, radiating pain associated with conditions like sciatica.
By applying precisely dosed and controlled intensity of decompressive forces, the BTL system physically separates the vertebrae by a tiny fraction of a millimeter. This microscopic enlargement of the intradiscal spaces creates an immense negative pressure vacuum. This vacuum effect does two critical things. First, it literally sucks the herniated or bulging disc material back into the center of the disc, immediately relieving the mechanical pressure placed on the pinched nerve roots. Second, and arguably most important for long-term healing, it initiates enhanced blood perfusion accompanied by profound rehydration of the disc.
Spinal discs have very poor natural blood supply, meaning they struggle to heal themselves once injured. The negative pressure created by the BTL multi-segmented electrically driven couch acts like a pump, drawing crucial oxygen, water, and nutrient-rich fluids back into the starving disc. This vital rehydration process is the cornerstone of genuine structural healing, transitioning the patient from temporary pain management to long-term structural recovery.
Essential Patient Screening, Safety Protocols, and Contraindications
While BTL spinal decompression therapy is celebrated for its incredible efficacy, ensuring maximum patient safety is the absolute highest priority before any treatment begins. A thorough pre-therapy screening must be conducted by a qualified healthcare professional. As stated at [00:02:04], operators must inquire about all contraindications and regular medications.
Because the machine physically alters the spacing of the spinal column, certain medical conditions render this treatment unsuitable. Understanding these contraindications ensures that patients are perfectly matched to the safest therapeutic intervention possible.
| Primary Indications for Decompression | Strict Medical Contraindications |
|---|---|
| Herniated or bulging intervertebral discs | Spinal or pelvic fractures |
| Degenerative disc disease and facet joint syndrome | Joint inflammatory conditions (e.g., Ankylosing Spondylitis) |
| Chronic lower back pain and severe sciatica | Severe osteoporosis or significant bone density loss |
| Cervical radiculopathy and chronic neck pain | Active pregnancy, spinal tumors, or spastic conditions |
Beyond preliminary screening, the BTL system incorporates active, real-time safety mechanisms. It is an absolute, non-negotiable protocol to hand the patient a manual safety button, shown clearly at [00:04:24]. This vital tool empowers the patient with total control, allowing them to instantly halt the procedure at any point if they experience sudden discomfort, anxiety, or sharp pain. The psychological reassurance of holding this safety button significantly reduces patient anxiety, which in turn helps keep the paraspinal muscles completely relaxed for a more effective treatment session.
Furthermore, before diving into a full therapy session, the clinician is required to perform a pre-intervention traction test [00:04:35]. By selecting the preset protocol and entering the patient's specific body weight, the system initiates a brief, low-level traction pull. The clinician then waits for verbal feedback from the patient to confirm the therapy is well tolerated. Only after passing this safety check does the true therapeutic progression begin. Additionally, built-in software warnings prevent accidental injury; for instance, if the prescribed force exceeds 20 kilograms, a prominent message box pops up to ensure such extreme forces are never mistakenly applied to delicate areas like the cervical spine [00:05:02].
The Precision Setup: Administering the Lumbar Spine Protocol
Treating chronic lower back pain requires precise anatomical targeting. The setup process for the BTL system ensures that the decompressive force is localized entirely on the targeted spinal segments rather than being dispersed randomly across the body. The therapist begins by attaching robust, heavily padded thoracic and lumbar belts to the couch.
Once the patient is assisted onto the table, the clinician actively palpates the patient's iliac crests (the top edge of the pelvic bone) as demonstrated at [00:03:18]. It is critical that the iliac crests rest exactly in the gap between the thoracic and pelvic tilt sections of the couch. This alignment ensures that as the table gently separates, the pull is isolated exactly at the lumbar vertebrae where the herniation or compression has occurred.
Securing the patient firmly is crucial to prevent slipping, which would negate the pulling force. The therapist instructs the patient to elevate their arms, take a deep inhale, and then fully exhale [00:03:24]. Fixing the thoracic belt during a full exhalation ensures a snug, highly secure fit that acts as a stable anchor point. Once the buckles are tightly fastened, the specialized rope from the main unit is attached, and the couch's sliding mechanism is unlocked, allowing the table's segments to glide smoothly and friction-free to execute the decompressive stretch.
Exploring Customized Treatment Angles: Supine, Prone, and Side-Lying
One of the most remarkable features of the BTL spinal decompression system is its sheer versatility. No two back injuries are identical. A posterior herniation requires a vastly different approach than an anterior herniation or a facet joint impingement. Because of this, the electrically driven couch offers over 20 distinct pain-relieving positions that can be fine-tuned to fit the patient's directional preference.
The Supine Position Variations
Lying comfortably on the back (supine) is heavily utilized because it promotes maximum muscular relaxation. The General Supine position [00:08:37] is the essential starting point for patients who cannot tolerate having their legs or spine flexed. However, for those looking for deeper relief, the Supine Flexion position is implemented. By raising the lower limbs on a padded bolster, the natural curve (lordosis) of the lower back is flattened. This flattening opens the posterior spacing of the intervertebral discs significantly wider, allowing for a more profound vacuum effect to retract herniated material.
To take precision a step further, therapists can utilize the position with pelvic flexion [00:09:03]. By slightly tilting the pelvic segment of the table, the clinician can perfectly direct the pulling force to target either the L4-L5 disc space or the specific L5-S1 junction, depending on where the patient's MRI confirms the injury.
The Prone Position Variations
For some patients, lying flat on the stomach brings immediate centralizing relief to their pain. The General Prone position [00:10:12] is fantastic because it actively opens the posterior facet joints. Facet joints are the bony connections at the back of the spine that guide movement. When cartilage wears down, these joints grind painfully against each other. Prone decompression pulls these joints apart, immediately stopping the bone-on-bone grinding and allowing synovial fluid to wash over the irritated joint capsule.
Advanced prone settings, like the Cradle position, promote deep lumbar extension. This aggressively centralizes the low back pain, pulling the radiating neuropathic pain out of the legs and isolating it back at the spine, which is a massive clinical indicator that the nerve root is successfully being freed from compression.
Side-Lying and Inversion Options
Highly sensitive patients who present in acute agony often cannot lie flat on their back or stomach. For these individuals, Side-lying positions [00:11:22] are life-saving transition setups. By flexing the hips and knees while lying on the side, lateral stretching of the soft tissues and paraspinal muscles is achieved safely. Furthermore, the Inverted position [00:12:06] uses the patient's own body weight and gravity to gently suppress initial extreme pain spasms, release massive muscle tension, and unload the entire thoracic spine before any heavy mechanical pulling is even attempted.
Cervical Spine Decompression: Conquering Chronic Neck Pain
While lower back pain is rampant, modern "tech neck" from staring at computers and smartphones has led to a massive surge in cervical spine deterioration. Herniated discs in the neck cause agonizing pain that shoots down the shoulder blades, arms, and even into the hands, often accompanied by severe numbness and tingling.
Treating the delicate cervical spine requires specialized hardware. As shown at [00:12:25], performing therapy for neck pain requires attaching a dedicated cervical slider to the head section of the couch. After removing the face pad and locking the rail horizontally, the cervical adapter is installed. The patient rests their head into the soft upholstery insert, and bilateral cervical belts are carefully placed. The rear belt cradles the scruff of the neck, while the front belt wraps gently over the patient's chin to provide a perfectly balanced, upward lifting force.
Because the vertebrae and musculature in the neck are much smaller and more delicate than in the lower back, the angles are infinitely adjustable to provide hyper-targeted treatments. In situations where lying flat induces dizziness or severe discomfort, the BTL system uniquely accommodates a sitting therapy adapter [00:16:20]. The patient simply sits in a stable chair beneath the main unit, and vertical cervical belts are attached to gently pull the head upward, elongating the cervical spine perfectly along the Y-axis.
Expanding Horizons: Treating Scoliosis and Degenerative Joint Conditions
The innovation of the BTL mechanical system extends far beyond standard disc herniations. It represents a total-body orthopedic rehabilitation tool. Patients suffering from scoliosis—an unnatural lateral curvature of the spine—can find significant relief through asymmetrical pulling forces.
By using a specific asymmetric adapter [00:18:38], the clinician can alter the angle of the main pulling rope to 5, 10, or 15 degrees laterally. This means the machine pulls harder on the concave, tightened side of the scoliotic curve while easing pressure on the overstretched convex side, actively working to realign the spine's mechanical axis.
Furthermore, degenerative joint conditions in the extremities are exceptionally responsive to decompression. Cartilage compression in the shoulders, wrists, hips, and knees leads to brutal osteoarthritis pain. By utilizing specialized extremity belts, the clinician can apply decompressive force directly to major joints.
- Shoulder and Wrist Treatment: The patient sits upright beside the couch, and straps are aligned across the arm or wrist to open the glenohumeral or carpal joint spaces, flooding them with healing synovial fluids [00:19:07], [00:20:04].
- Hip and Knee Rehabilitation: Using an extremity belt over the ankle, forces can be directed through the leg. For optimal hip decompression, the clinician sets the couch to a precise 10-degree abduction, 10-degree external rotation, and 10-degree flexion, creating the perfect biomechanical "open-packed" position for the hip capsule to separate and heal [00:20:29].
The Vital Importance of Post-Therapy Recovery and Relaxation
The active pulling portion of the therapy is only half the battle. What happens in the minutes immediately following the mechanical stretching is crucial to the long-term success of the treatment protocol. Once the active cycle concludes, the clinician detaches the ropes and carefully releases the patient from the tight lumbar and thoracic belts [00:06:36].
It is medically mandated to leave the patient to relax on the couch for at least half of the total active therapy time in the exact same position they were treated in. If the decompression cycle lasted 20 minutes, the patient must rest quietly for 10 minutes. Why? Because the spinal discs and surrounding musculature are incredibly vulnerable immediately after being intensely manipulated. Allowing the body to rest ensures that the newly rehydrated discs stabilize, the paraspinal muscles gradually recalibrate to their new resting length, and the nervous system comes out of a sympathetic "fight or flight" response.
Finally, once the post-treatment relaxation is officially over, the clinician presses the letter "P" on the computerized controller [00:06:59]. This initiates a slow, highly controlled motorized sequence that returns the multi-segmented decompression couch back to its completely flat, initial "parking position." Only then is the patient safely assisted to a seated position, ready to walk away with a newly rehydrated spine, vastly decreased nerve pain, and restored overall mobility.
Ready to Reclaim Your Active, Pain-Free Life?
Don't let chronic back pain, sciatica, or herniated discs limit your daily activities any longer. Discover how BTL's advanced non-invasive decompression technology can provide profound, lasting relief without the risks of surgery.
DISCOVER BTL THERAPY OPTIONSView Full Video Transcript
[00:00:03] foreign video demonstrates how to perform therapy with the BTL spinal decompression
[00:00:18] get to know the non-invasive alternative to spine surgery BCL presents the most sophisticated decompression therapy with accented comfort for
[00:00:29] both the patient and the operator spinal decompression consists of a multi-segmented electrically driven couch and the main unit that
[00:00:38] generates the decompressive forces which are transferred to the patient's body spinal decompression is the only product of its kind
[00:00:46] that allows for numerous combinations of positioning according to patients directional preferences and pain relief spinal decompression therapy can be
[00:00:55] performed in prone side lying or supine positions operators can use any of the preset positions or set their own
[00:01:04] spinal decompression is not only suitable for treatment of back pain but also for the treatments of extremities or scoliosis
[00:01:11] as well as offers the very first integrated and fully automated decompression for cervical spine understand the mechanism of action
[00:01:24] spinal decompression aims to unload and release neural spinal structures in more than 20 pain relieving positions which can be
[00:01:32] fine-tuned to innumerable combinations according to the patient's directional preference pain relief is achieved through precisely dosed and controlled intensity
[00:01:42] of decompressive forces applied over the vertebrae this leads to enlargements of intradiscal spaces and enhanced blood profusion accompanied by
[00:01:52] rehydration of the disc prior to the therapy require about all contraindications and medications that the patient uses regularly the
[00:02:04] most important contraindications of fractures joint inflammatory conditions osteoporosis spastic conditions pregnancy and tumor however do not forget to consult
[00:02:16] the operator's manual for the full list of contraindications warnings and cautions perform the spinal decompression therapy for low back
[00:02:27] pain Step by Step attach thoracic and Lumbar belts to the decompression couch
[00:02:50] assist the patient to lie on the couch and explain that you're about to set the couch into the pain
[00:02:55] relieving position that is chosen according to the patient's directional preferences and symptoms you can choose any preset position by
[00:03:03] clicking the letter M on the controller or by clicking individual buttons corresponding to individual parts of the couch and
[00:03:11] setting your own position once the couch position is set palpate the patient's iliac crests and make sure that they
[00:03:18] are in the gap between thoracic and pelvic tilt parts of the couch then attach and fix the lumber belt
[00:03:24] first ask the patient to elevate arms inhale and fully exhale so you can fix the thoracic belt
[00:03:38] finally fix the Buckle and tighten the lumber belt foreign
[00:03:55] positions with flexed lower limbs pull the lower part of the lumbar belt through the couch
[00:04:05] attach the belt to the rope that is placed on the rear side of the main unit
[00:04:16] unlock the couch to release the sliding mechanism
[00:04:24] give the patient the safety button to stop the procedure at any time this is absolutely mandatory perform the pre-intervention
[00:04:35] traction test first click on the preset protocol traction test and set the patient's weight initiates the traction test and
[00:04:44] wait for the patient's feedback whether the therapy is well tolerated
[00:04:55] the test is finished and the patient tolerates the therapy you can continue the procedure by choosing the desired preset
[00:05:02] from the list if the maximum force is about 20 kilograms the message box will pop up to ensure that
[00:05:11] such a high force is not applied to the cervical spine although the patient has to have a safety button
[00:05:17] you should not leave the patient unattended
[00:05:27] foreign
[00:05:56] what to do after the therapy take the safety button from the patient
[00:06:08] detach the rope from belts lock the couch and sliding system
[00:06:17] detach the belt buckle and store the lower part of the belt
[00:06:26] release the patient from Lumbar and thoracic belts
[00:06:36] leave the patient to relax at least half of the therapy time in the same position
[00:06:51] once the post-treatment relaxation is over inform the patient that you will return the decompression couch into the initial position
[00:06:59] press the letter P on the controller to get the decompression couch and all its parts into the initial the
[00:07:06] so-called parking position assist the patient to sit down see how to perform therapy for the lumbar spine in a
[00:07:16] prone position the couch position is set palpate the patient's iliac crests and make sure that they are in the
[00:07:24] gap between thoracic and pelvic tilt parts of the couch attach the lumber belt first
[00:07:38] fix the Buckle and tighten the lumber belt
[00:07:57] ask the patient to inhale and fully exhale so you can fix the thoracic belt
[00:08:05] thoracic belt should not cover buckles of the lumbar belt
[00:08:19] attach the belt to the rope that is placed on the rear side of the main unit and continue with
[00:08:24] other previously mentioned steps other options for how to position the patient with low back pain Supine position General Supine
[00:08:37] position is an essential position that brings pain relief to patients who do not tolerate flexion of lower Limbs and
[00:08:44] lumbar spine
[00:08:50] supine flexion position is an extended Supine position that brings more intense pain relief due to raised lower Limbs and
[00:08:58] flattened lumbar lordosis
[00:09:03] position with the pelvic flexion allows for the most precise targeting of lumbar spine segments due to pelvic tilt
[00:09:16] the biggest advantage of a semi-upright position is easier breathing position brings pain relief to patients who tolerate trunk and
[00:09:25] lumbar spine flexion
[00:09:34] inclined semi-upright position promotes gentle stretching of soft tissues in the lumbar area and it is suitable for extremely sensitive
[00:09:43] patients
[00:09:49] at the end of therapy the therapist can comfortably return the decompression couch into an initial position by pressing the
[00:09:56] letter P on the controller which stands for parking position
[00:10:05] foreign
[00:10:09] position
[00:10:12] General prone position is an essential position that brings pain relief to patients who tolerate lying on the abdomen furthermore
[00:10:19] it opens facet joints and enhances pain relief
[00:10:26] so if prone flexion position is that it increases space between facet joints reduces pressure on the nerve root and
[00:10:33] promotes stretching of thoraco Lumbar fascia this position can be used once pain is more centralized
[00:10:44] the roof position is an extended option for increasing space between facet joints for reducing pressure on the nerve root
[00:10:51] and stretching thoraco lumbar fascia again this position can be used once pain is more centralized cradle position promotes deep
[00:11:01] Lumber extension for even more enhanced centralization of the low back pain this position is a combination of targeted lumbar
[00:11:09] spine positioning and fine-tuning of lower extremities promotes even more intense pain relief side lying side lying represents various transition
[00:11:22] positions for very sensitive patients settable positions vary from horizontal side lying Flex to more extended positions
[00:11:33] these positions promote lateral stretching of soft tissues and paraspinal muscles
[00:12:02] thank you inversion
[00:12:06] inverted position is used to suppress initial pain in extremely sensitive patients furthermore this position promotes unloading of the thoracic
[00:12:16] spine and releases muscle spasms this position is used without the main unit
[00:12:25] perform the spinal decompression therapy for neck pain Step by Step first it is needed to attach the cervical slider
[00:12:34] in the head part of the decompression couch remove face pad and or upholstery insert put the rail into the
[00:12:41] horizontal position and use the lock to secure it install the cervical adapter by using the PIN to lock the
[00:12:49] adapter in the rail finally put the upholstery insert back onto the cervical adapter
[00:12:58] prepare the cervical belts and place it bilaterally over the cervical adapter
[00:13:22] assist the patient to lie down
[00:13:28] position the patient into the cervical adapter so the rear part of the belt lies under the scruff place the
[00:13:35] front part of the belt on the patient's chin you might ask the patient to assist you by holding the
[00:13:40] belt over his chin attach belts bilaterally adjust the angle of the head parts for even more targeted treatments of
[00:13:49] cervical spine finally ask the patient to shift slightly downwards and stay still
[00:13:59] give the patient the safety button to stop the procedure at any time this is absolutely mandatory attach the rope
[00:14:07] from the main unit to the Bowden below the decompression couch
[00:14:18] perform the pre-intervention traction test first
[00:14:24] follow with the therapy
[00:14:35] what to do after the therapy
[00:14:39] touch the rope from the Bowden
[00:14:47] take the safety button from the patient
[00:14:52] release the cervical belt and explain to the patient that it is necessary to relax after the therapy at least
[00:14:58] half of the therapy time
[00:15:03] leave the patient to relax at least half of the therapy time in the same position once the post-treatment relaxation
[00:15:11] is over inform the patient that you will return the decompression couch into the initial position press the letter P
[00:15:19] on the controller to get the decompression couch and all its parts into the initial the so-called parking position
[00:15:38] assist the patient to sit down
[00:15:45] how to detach the cervical slider remove cervical belts from the slider
[00:16:05] release the cervical slider from the rail
[00:16:11] unlock the rail and put back the upholstery insert and or face pad
[00:16:20] see how to perform the decompression therapy of the cervical spine in a sitting position sitting therapy adapter is needed
[00:16:29] to perform such a therapy
[00:16:36] lets the patient sit on a stable chair under the sitting therapy adapter fixed bilaterally cervical belts
[00:16:51] give the patient the safety button to stop the procedure at any time perform the pre-intervention traction test first follow
[00:17:01] with the therapy to do after the therapy
[00:17:09] take the safety button from the patient release the cervical belt and explain to the patient that it is necessary
[00:17:16] to relax after the therapy at least half of the therapy time leave the patient to relax at least half
[00:17:24] of the therapy time in the same position
[00:17:30] learn how to perform spinal decompression therapy with scoliotic patients the counterposition is set palpates the patient's iliac crests and
[00:17:42] make sure that they are in the gap between thoracic and pelvic tilt parts of the couch attach the lumber
[00:17:49] belt first
[00:17:57] fix the Buckle and tighten the lumber belt
[00:18:15] ask the patient to inhale and fully exhale so you can fix the thoracic belt
[00:18:24] thoracic belts should not cover buckles of the lumbar belt
[00:18:38] use an asymmetric adapter to set the angle of pull adapter allows for setting the angle to 5 10 or
[00:18:47] 15 degrees
[00:18:58] finally attach the belt to the rope and place it under the patient's leg how to perform decompression therapy in
[00:19:07] degenerative joint conditions for shoulder treatments let the patient sit by the upper part of the couch
[00:19:17] it's an extremity belt over the arm
[00:19:24] fix the belt by using straps
[00:19:38] thank you
[00:19:43] attach rope with the spread bar to the straps and make sure that they are aligned
[00:19:58] for the treatments of the rest use acceler posts and let the patient sit on the lateral side of the
[00:20:04] couch use an extremity belt over the rest fix the belt by using straps
[00:20:29] for the treatments of the hip and Ankle use an extremity belt over the ankle for the treatments of the
[00:20:35] ankle it is sufficient to stay in the horizontal position of the couch treatments of the Hep it is needed
[00:20:42] to set 10 degree abduction and 10 degree of external rotation finally use the controller to set the lower part
[00:20:49] of the couch to 10 degree flexion
[00:21:00] for the treatments of the knee use an extremity belt over the ankle finally use the controller to flex the
[00:21:07] lower part of the couch
[00:21:13] foreign how to insert a face pad remove the upholstery insert and put the face pad into the hole
[00:21:29] how to choose any of the preset positions
[00:21:35] click on the blue on off button
[00:21:43] click on the letter M and then the plus or minus button to change positions
[00:21:55] foreign


.jpg)

.jpg)

Share this listing