
The Essential Guide to Breast Self-Examination: Master the Art of Early Detection
Empowerment in women's health begins with self-awareness and proactive monitoring. Breast self-examination (BSE) serves as a critical first line of defense, enabling you to become familiar with the unique landscape of your body and identify changes early when they are most treatable. While modern imaging technology like mammography is indispensable, the ability to perform a thorough manual check at home can provide peace of mind and potentially life-saving insights.
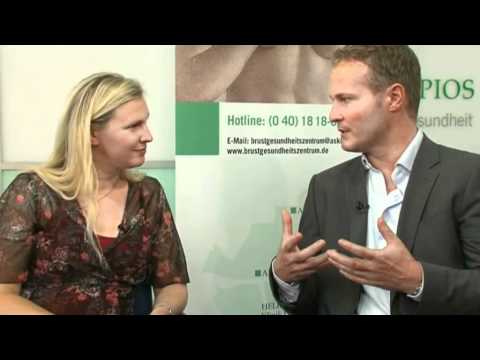
In this clinical demonstration by Asklepios, we explore the professional techniques for palpation, the importance of timing within your hormonal cycle, and how to differentiate between normal glandular tissue and suspicious findings. Understanding your anatomy is the first step toward lifelong breast health and confidence.
Video Chapters & Clinical Navigation
The Importance of Timing: When to Perform Your Exam
Timing is a critical variable in the accuracy of a breast self-exam. Because female breast tissue is highly sensitive to hormonal fluctuations, its density and sensitivity change throughout the menstrual cycle. Performing an exam at the wrong time can lead to false alarms or unnecessary anxiety due to natural cyclical changes.
As demonstrated at [00:18], the most effective time to palpate the breast is immediately following your period. During this phase, estrogen and progesterone levels drop, causing the breast tissue to become softer and less lumpy. This "soft tissue" window makes it much easier to distinguish between normal mammary glands and a true abnormality.
For individuals who are post-menopausal or have irregular cycles, it is recommended to choose a specific day of the month—such as the first or the fifteenth—and maintain consistency. Consistent monthly checks allow you to build a "tactile memory" of your breast tissue, making any deviation from the norm immediately apparent.
Mastering the Palpation Technique
Effective breast screening requires a systematic approach rather than a random search. The goal is to cover every square inch of breast tissue, extending from the collarbone down to the base of the ribcage and from the armpit to the breastbone. Using the correct part of your hand is vital for tactile sensitivity.
The Two-Finger Method
At [00:42], the expert illustrates the use of the pads (not the tips) of the index and middle fingers. The finger pads are the most sensitive part of the hand and should be kept flat against the skin. By keeping the fingers together, you increase the surface area and the stability of the palpation.
This technique involves small, circular motions—about the size of a dime—moving slowly across the tissue. It is important not to lift the fingers off the skin as you transition between spots, as this ensures no area is skipped. This continuous contact allows for a fluid assessment of the underlying structures.
The Three-Tiered Pressure Approach
Lumps can occur at various depths within the breast tissue. A surface-level touch might miss a deep-seated mass, while immediate deep pressure might obscure a small lesion near the skin. A thorough exam requires a "three-level" pressure strategy for every spot you check.
| Pressure Level | Target Depth | What You Are Feeling For |
|---|---|---|
| Light Pressure | Skin Surface | Skin changes, rashes, or very shallow cysts. |
| Medium Pressure | Middle Tissue | The bulk of the mammary glandular tissue. |
| Firm Pressure | Deep / Ribcage | Masses located close to the chest wall or deep fascia. |
As demonstrated around [00:50], start with a feather-light touch, then increase to medium, and finally use firm pressure. Many women are hesitant to press deeply, fearing they might cause damage, but as the video notes at [01:58], it is essential to reach the deep layers to find hidden findings. Deep palpation shouldn't be painful, but it must be thorough.
Mapping High-Risk Zones: The Upper Outer Quadrant
While cancer can develop anywhere in the breast, statistics show a significantly higher incidence in one specific area. Understanding this "map" of the breast helps you focus your attention where it matters most. Experts divide the breast into four quadrants: Upper Inner, Lower Inner, Lower Outer, and Upper Outer.
At [02:20], Dr. Scholz points out that the majority of malignant findings occur in the upper outer quadrant (the section closest to the armpit). This area contains the highest concentration of glandular tissue and extends toward the axilla in what is known as the "Tail of Spence."
The exam should follow a "clock-face" pattern or a "meandering" (zig-zag) path. Starting at the 12 o'clock position [00:32], you should work your way around the breast in a clockwise direction, moving inward toward the nipple in concentric circles. This ensures that the dense tissue near the nipple is not neglected.
What Does a Suspicious Finding Feel Like?
Not all lumps are cancerous. In fact, many findings are benign cysts, fibroadenomas, or simply thickened glandular tissue. However, being able to describe the "characteristics" of what you feel is vital when communicating with your physician.
In the demonstration at [03:22], the expert describes a suspicious finding as often being hard, irregular in shape, and non-movable. A benign cyst often feels like a smooth, soft grape that can be "pushed" around under the skin. Malignant tumors, conversely, are often anchored to the surrounding tissue and feel like a hard pebble or a knot.
Warning Signs to Monitor
- Texture Changes: Skin that resembles an orange peel (peau d'orange).
- Nipple Inversion: A nipple that has recently pulled inward or changed direction.
- Discharge: Spontaneous fluid leakage, especially if bloody or clear.
- Fixed Masses: Any lump that feels "stuck" to the chest wall or skin.
Integrating Self-Exams with Professional Care
Breast self-examination is a supplement to, not a replacement for, professional medical screenings. If you detect a lump, there is no need to panic—8 out of 10 breast lumps are not cancerous. However, any new finding must be evaluated by a healthcare provider immediately.
Professional diagnostics typically involve a "Triple Assessment": a clinical breast exam by a doctor, imaging (mammogram or ultrasound), and, if necessary, a biopsy. By performing your monthly self-exams, you provide your doctor with a historical baseline, helping them understand if a finding is truly new or has been a stable part of your anatomy for years.
Asklepios and other leading medical institutions emphasize that early detection is the single most important factor in successful breast cancer treatment outcomes. Your hands are one of the most sophisticated diagnostic tools you possess—use them regularly and with confidence.
Ready to Restore Your Smile in Egypt?
PlacidWay Medical Tourism connects you with top-rated dental clinics in Egypt, offering world-class care at unbeatable prices. Let us handle the details while you focus on your new smile.
GET A FREE QUOTE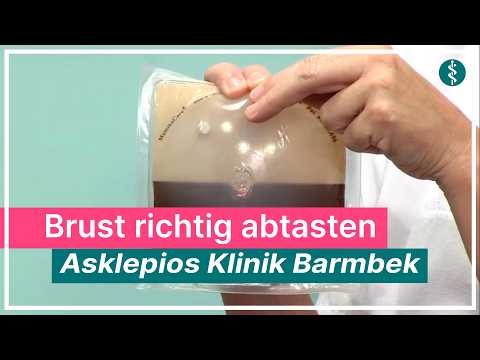



























Share this listing